> ## Documentation Index
> Fetch the complete documentation index at: https://docs.aptlydone.com/llms.txt
> Use this file to discover all available pages before exploring further.
# SSO & SCIM Config
> Configure Single Sign-On (SSO) and SCIM provisioning with Aptly.
# SSO & SCIM Setup
Aptly supports Single Sign-On (SSO) and SCIM-based user provisioning via a self-service configuration suite, powered by our identity provider, Descope.
Your Aptly team will provide a secure setup link unique to your organization. Once received, your identity administrator can follow the steps below to complete the integration.
***
## SSO Configuration
Once your organization receives the Aptly-provided **SSO Setup Suite** link, your identity administrator can begin the SSO configuration process.
***
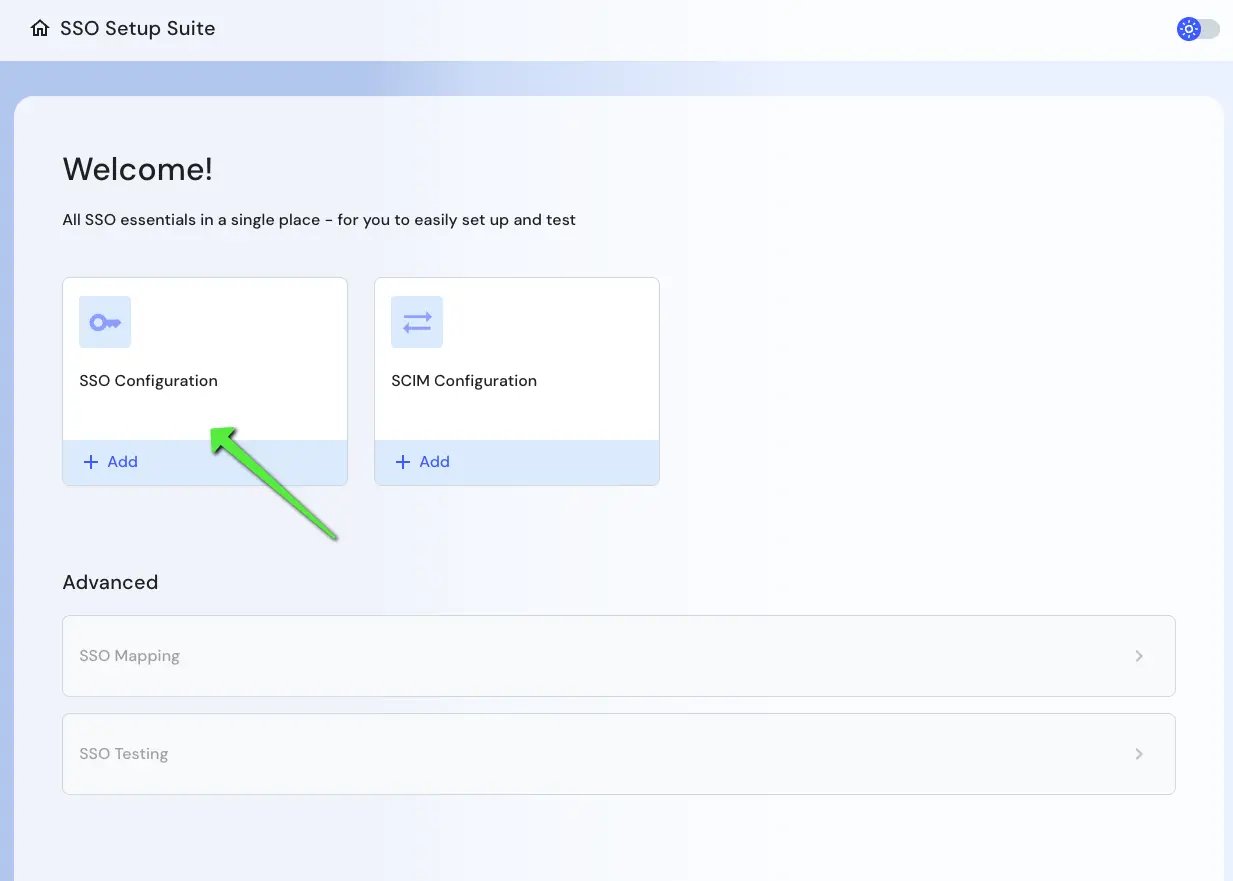
### 1. Launching the Setup Suite
Start by clicking the **SSO Configuration** card.
 ***
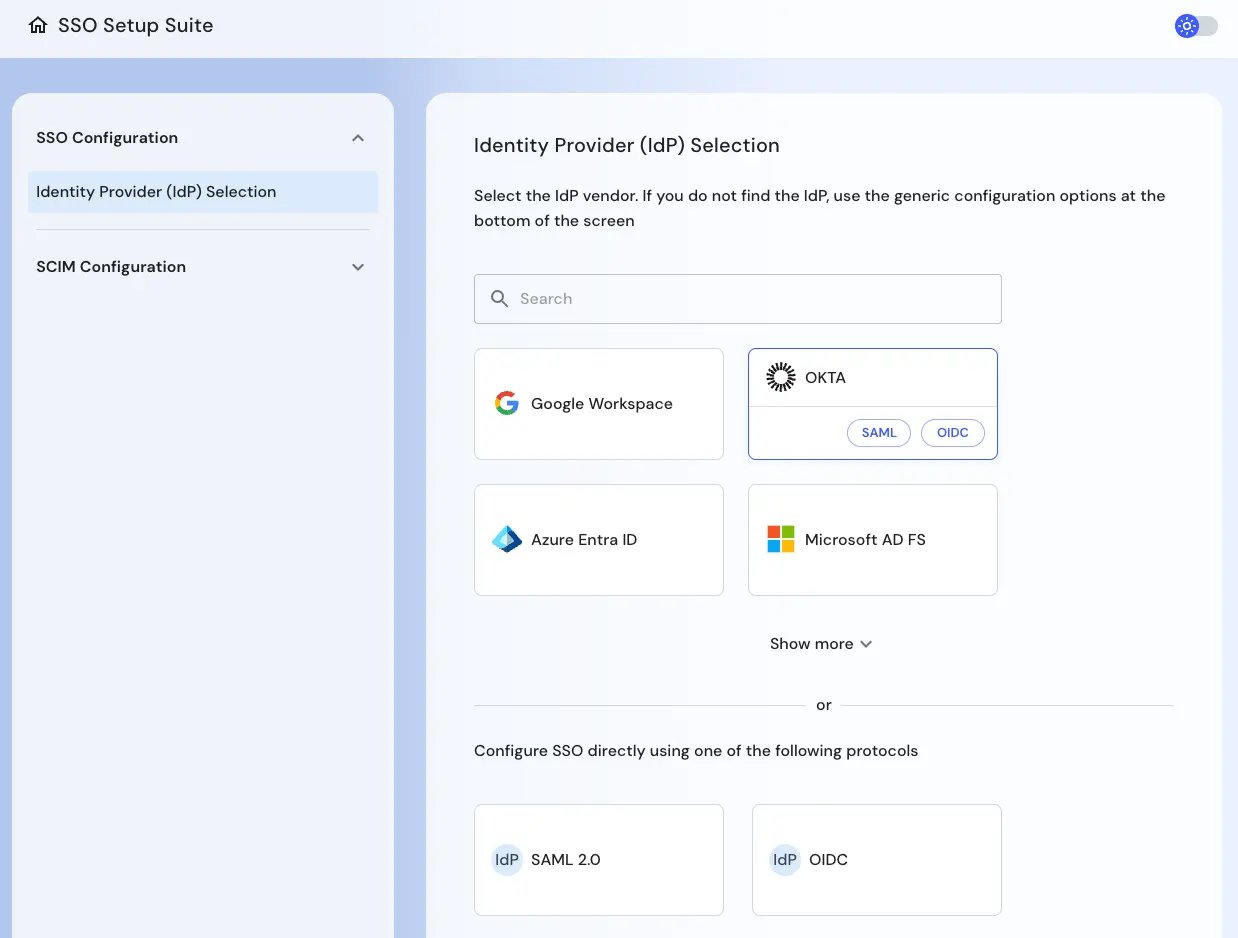
### 2. Select Your Identity Provider
Choose your organization’s identity provider. Aptly supports:
* Google Workspace
* Okta
* Microsoft Entra ID (Azure AD)
* Microsoft AD FS
* Any SAML 2.0 or OIDC-compliant provider
***
### 2. Select Your Identity Provider
Choose your organization’s identity provider. Aptly supports:
* Google Workspace
* Okta
* Microsoft Entra ID (Azure AD)
* Microsoft AD FS
* Any SAML 2.0 or OIDC-compliant provider
 ***
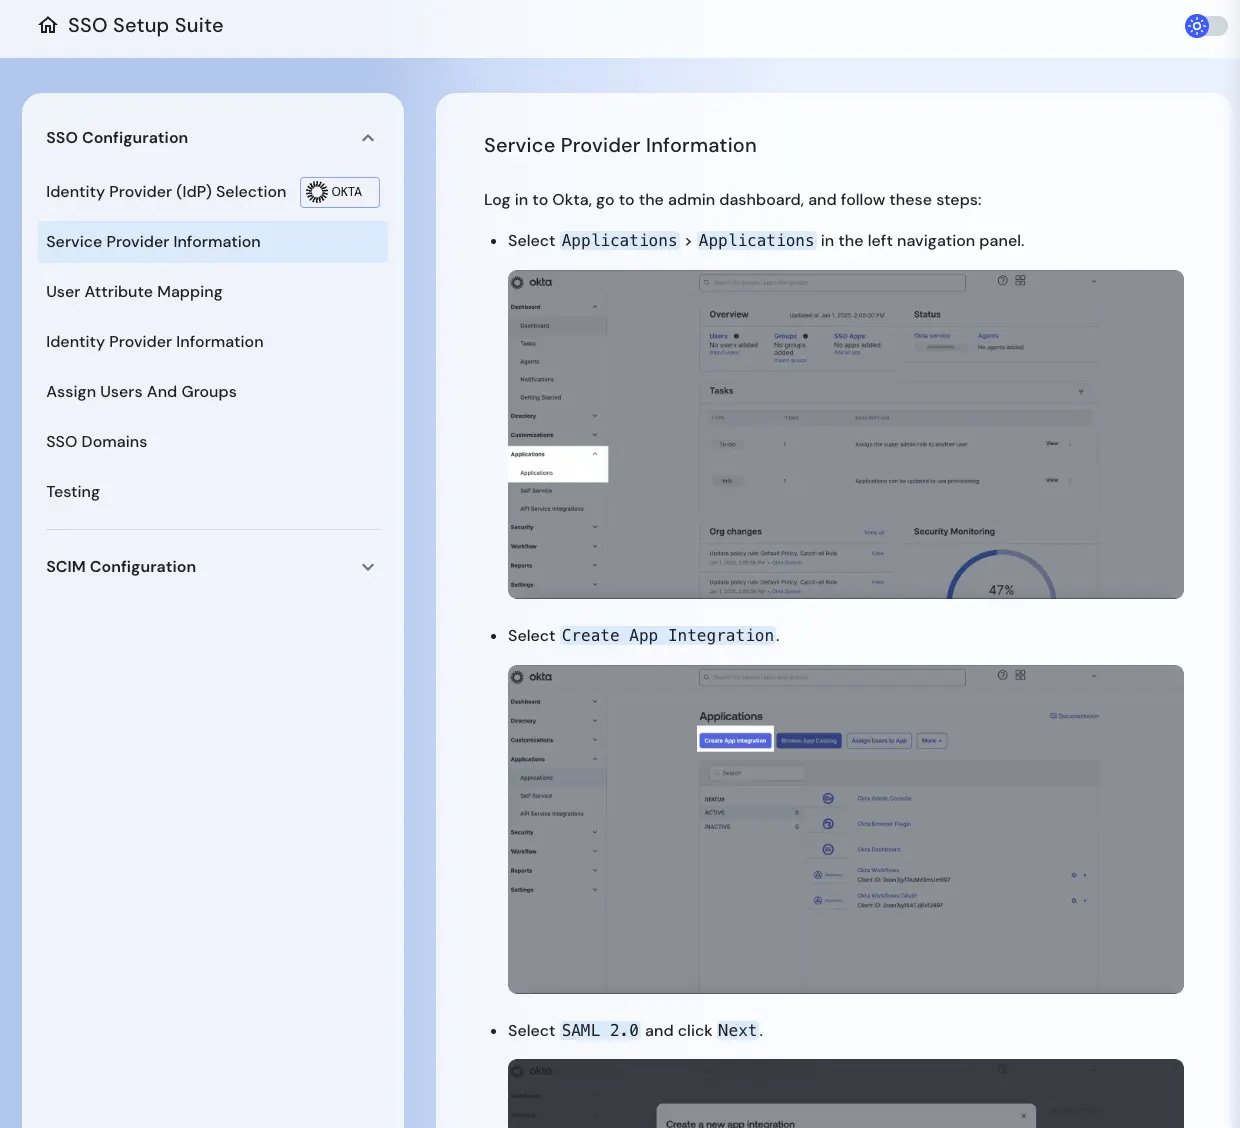
### 3. Enter Service Provider Information
In your IdP’s admin console, create a new SAML or OIDC app. Then enter the metadata requested by the Setup Suite.
***
### 3. Enter Service Provider Information
In your IdP’s admin console, create a new SAML or OIDC app. Then enter the metadata requested by the Setup Suite.
 ***
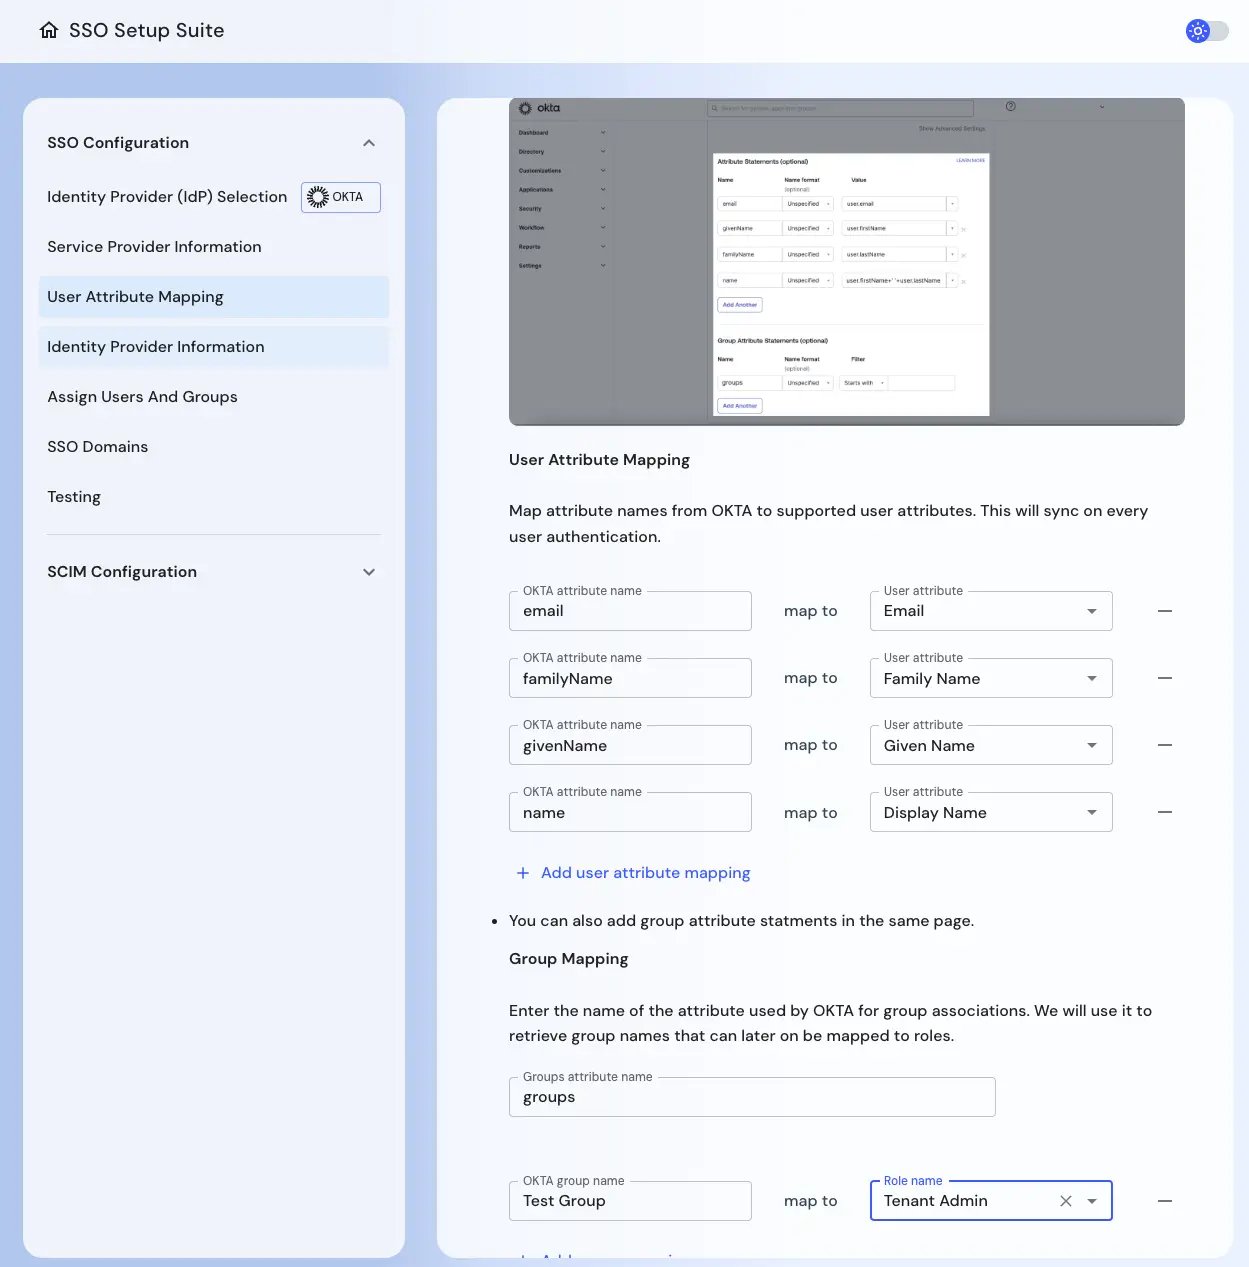
### 4. Map User Attributes
Match the identity attributes (e.g., email, name) from your IdP to Aptly's user model. These will apply during each login.
***
### 4. Map User Attributes
Match the identity attributes (e.g., email, name) from your IdP to Aptly's user model. These will apply during each login.
 ***
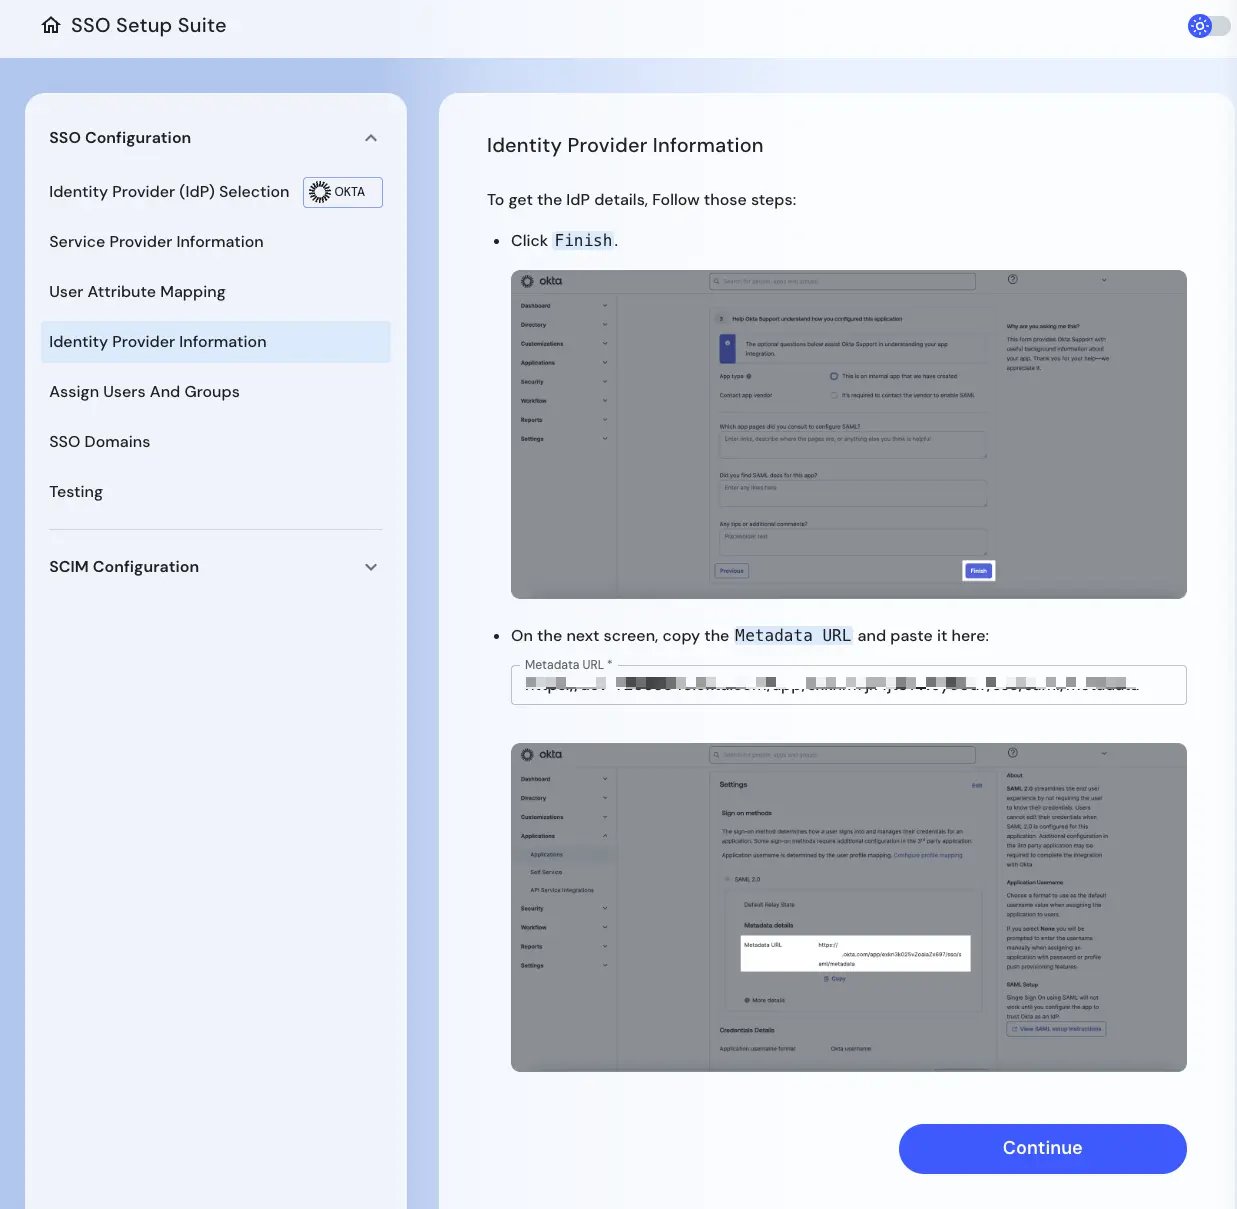
### 5. Enter Identity Provider Metadata
Paste your IdP metadata URL or upload the values manually to complete the configuration.
***
### 5. Enter Identity Provider Metadata
Paste your IdP metadata URL or upload the values manually to complete the configuration.
 ***
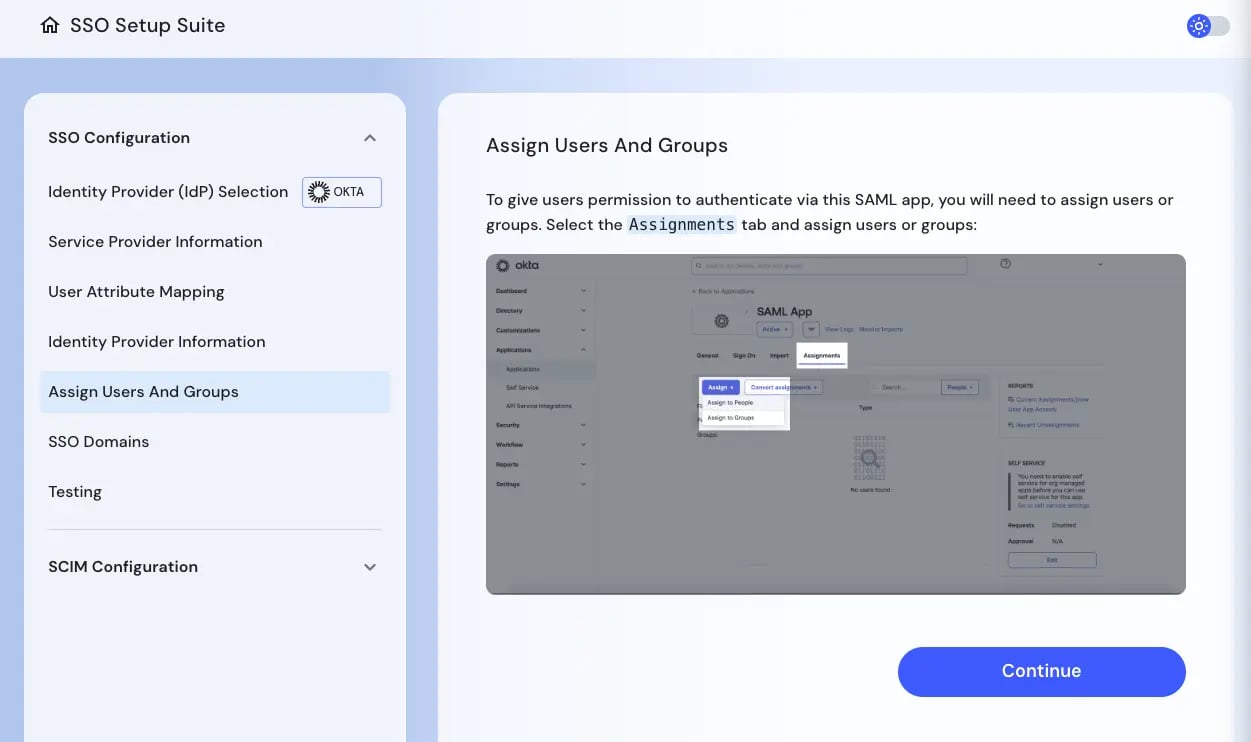
### 6. Assign Users and Groups
Make sure users and/or groups are assigned to the application in your IdP.
***
### 6. Assign Users and Groups
Make sure users and/or groups are assigned to the application in your IdP.
 ***
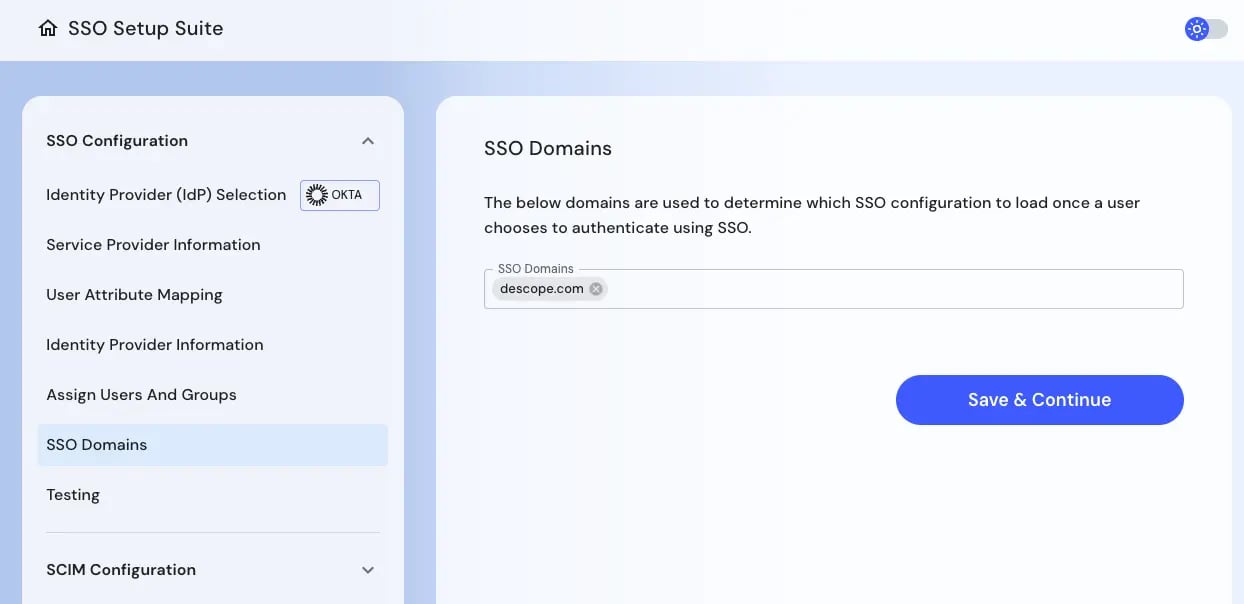
### 7. Configure SSO Domains
Specify which email domains (e.g., `yourcompany.com`) should trigger SSO login through your configuration.
***
### 7. Configure SSO Domains
Specify which email domains (e.g., `yourcompany.com`) should trigger SSO login through your configuration.
 ***
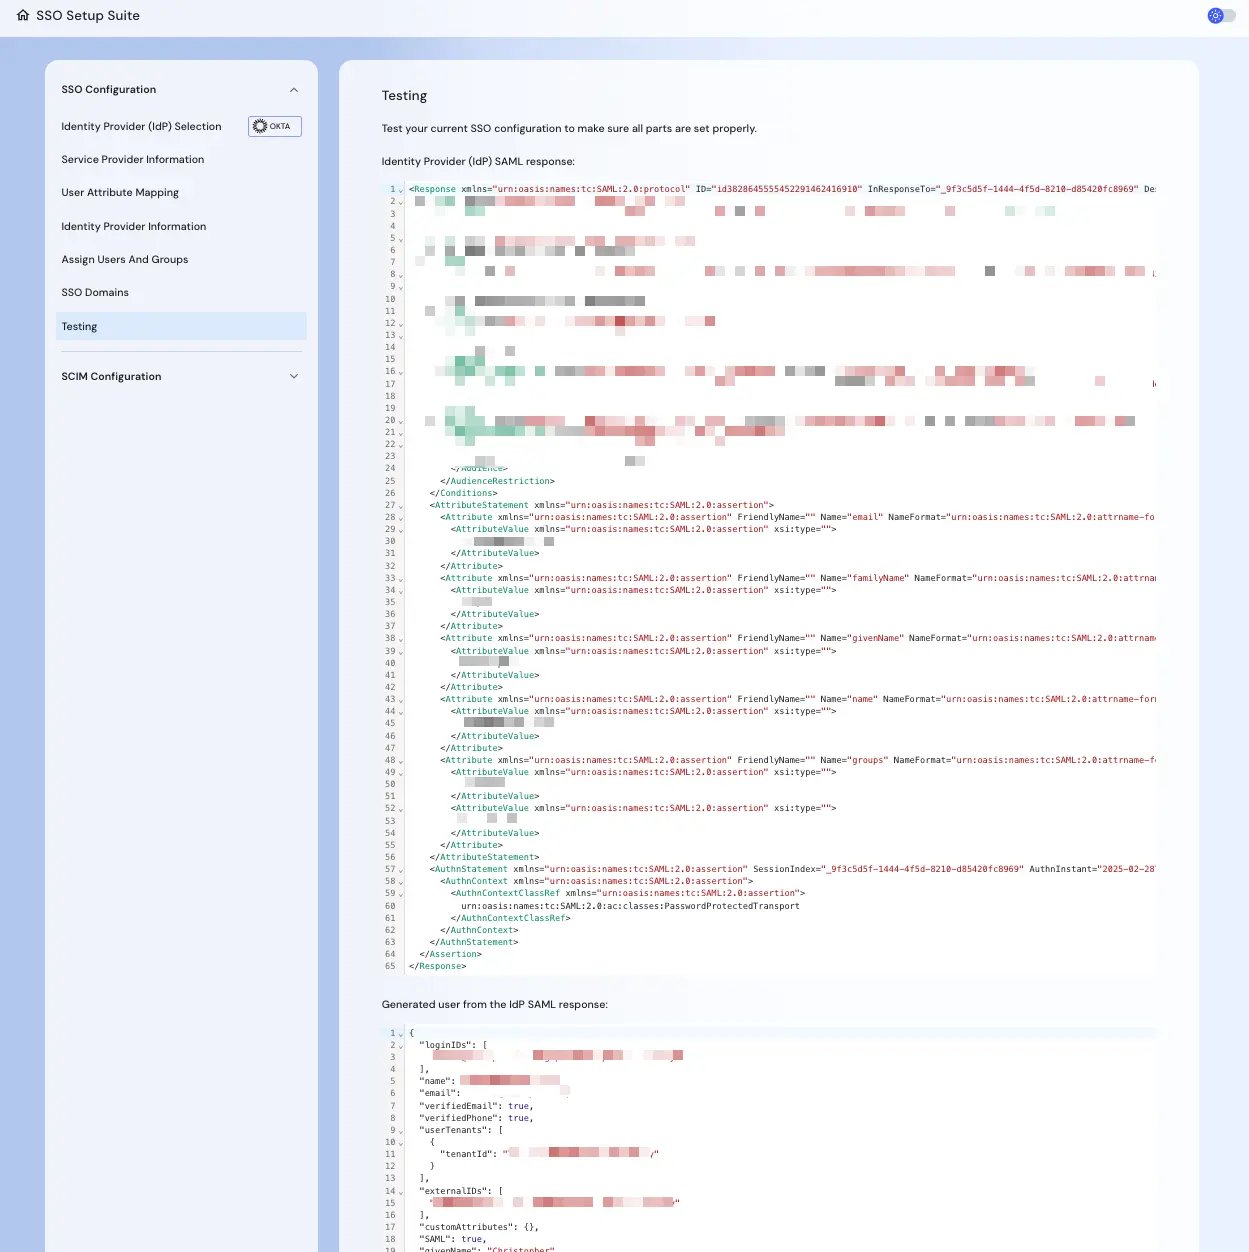
### 8. Test Your Configuration
Use the **Testing** screen to review your IdP response and confirm mappings to the Aptly user model.
***
### 8. Test Your Configuration
Use the **Testing** screen to review your IdP response and confirm mappings to the Aptly user model.
 ***
Once your SSO configuration is complete, proceed to SCIM provisioning below.
***
## SCIM Configuration
SCIM provisioning allows your IdP to automatically manage user accounts and group membership in Aptly.
***
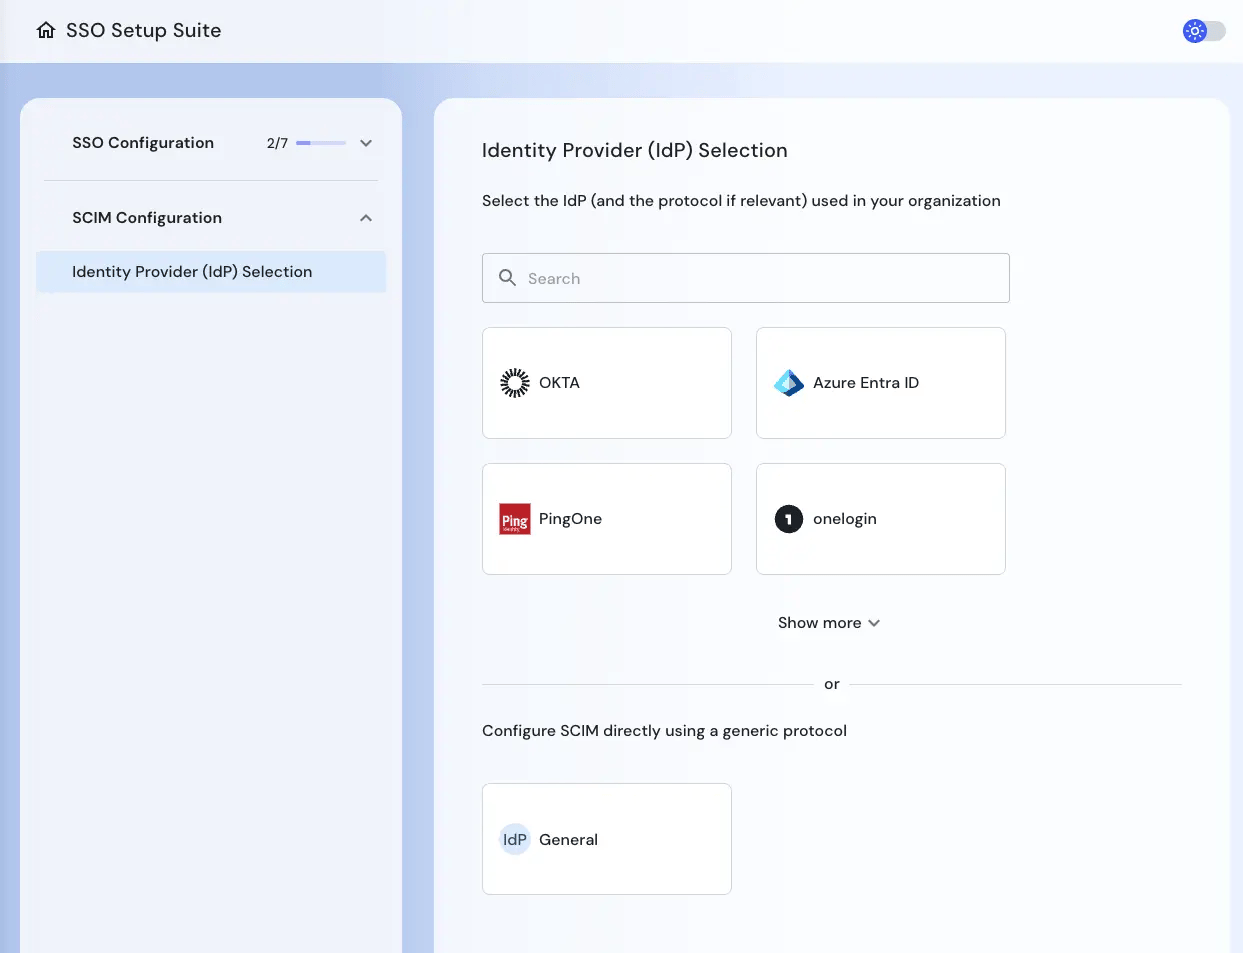
### 1. Launch SCIM Setup
From the Setup Suite homepage, click the **SCIM Configuration** card.
***
Once your SSO configuration is complete, proceed to SCIM provisioning below.
***
## SCIM Configuration
SCIM provisioning allows your IdP to automatically manage user accounts and group membership in Aptly.
***
### 1. Launch SCIM Setup
From the Setup Suite homepage, click the **SCIM Configuration** card.
 ***
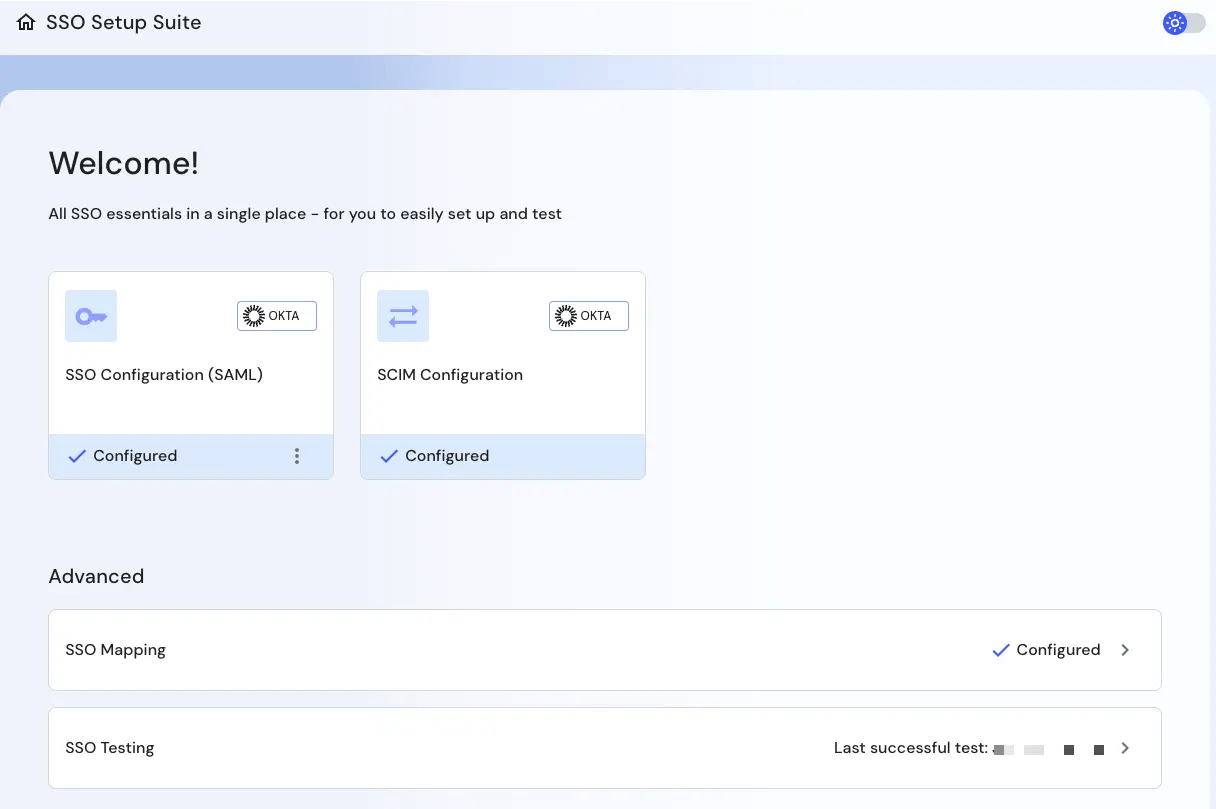
### 2. Select Your Identity Provider
Select the IdP you’ll use to manage SCIM. Aptly supports:
* Okta
* Azure Entra ID
* PingOne
* OneLogin
* Any SCIM 2.0-compatible provider
***
### 2. Select Your Identity Provider
Select the IdP you’ll use to manage SCIM. Aptly supports:
* Okta
* Azure Entra ID
* PingOne
* OneLogin
* Any SCIM 2.0-compatible provider
 ***
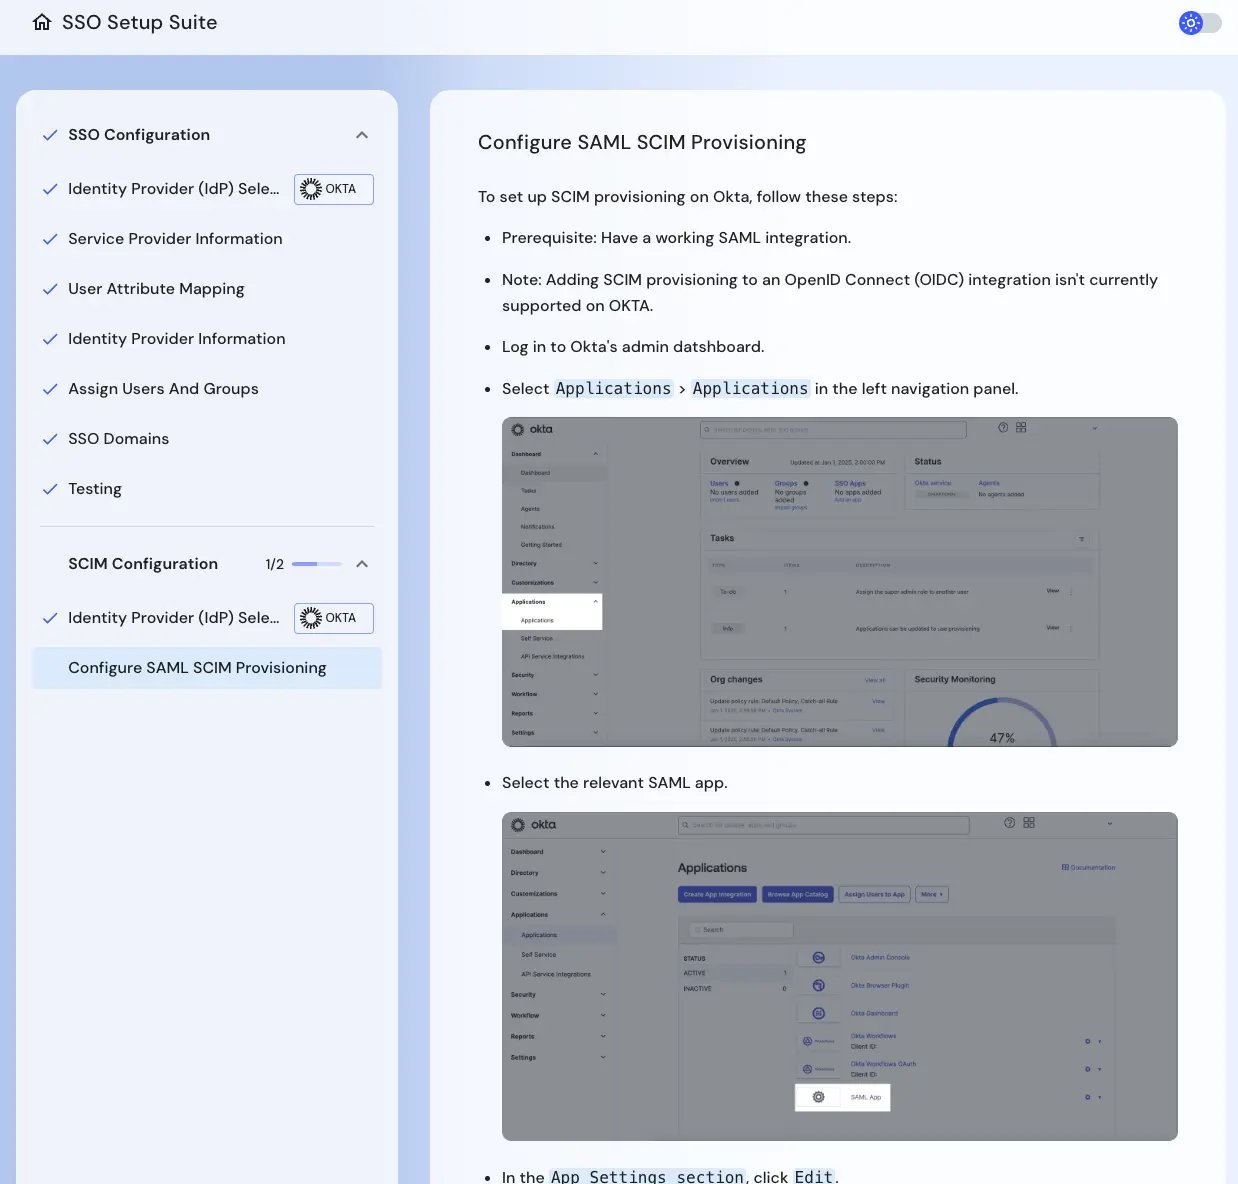
### 3. Configure SCIM in Your IdP
Use the values provided in the Setup Suite to connect your IdP to Aptly.
* **SCIM connector base URL**:\
`https://api.descope.com/scim/v2`
* **Authorization Header**:\
`Bearer ` (provided in Setup Suite)
* **Authentication Mode**: HTTP Header
* **Unique Identifier Field**: `userName` (default)
* **Supported Provisioning Actions**:
* Import New Users
* Push Profile Updates
* Deactivate Users
* Sync Groups
***
### 3. Configure SCIM in Your IdP
Use the values provided in the Setup Suite to connect your IdP to Aptly.
* **SCIM connector base URL**:\
`https://api.descope.com/scim/v2`
* **Authorization Header**:\
`Bearer ` (provided in Setup Suite)
* **Authentication Mode**: HTTP Header
* **Unique Identifier Field**: `userName` (default)
* **Supported Provisioning Actions**:
* Import New Users
* Push Profile Updates
* Deactivate Users
* Sync Groups
 ***
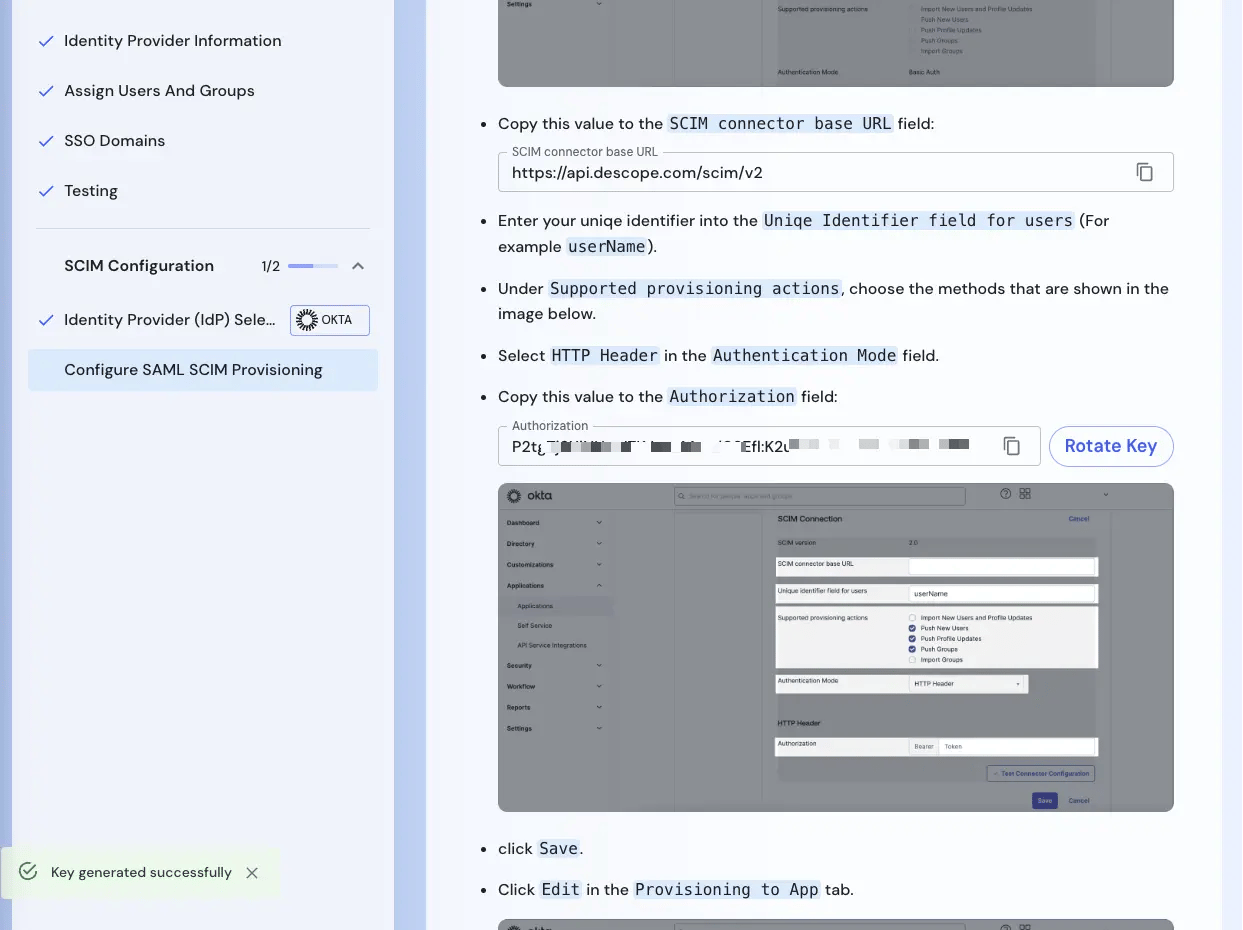
### 4. Save and Test
Once configured:
* Save the setup
* Use your IdP’s **“Provision on demand”** or **“Test Connector Configuration”** feature to validate
***
### 4. Save and Test
Once configured:
* Save the setup
* Use your IdP’s **“Provision on demand”** or **“Test Connector Configuration”** feature to validate
 > ⚙️ Once validated, Aptly will begin automatically receiving user and group updates.
***
## What’s Next?
After completing SSO and SCIM setup, you can:
* Automatically onboard/offboard users in Aptly
* Delegate authority and signatory rights by group, role, or region
* Keep approval chains current based on live org data
***
Need help with identity setup or SCIM mappings?\
Contact [support@aptlydone.com](mailto:support@aptlydone.com) and we’ll walk you through it.
> ⚙️ Once validated, Aptly will begin automatically receiving user and group updates.
***
## What’s Next?
After completing SSO and SCIM setup, you can:
* Automatically onboard/offboard users in Aptly
* Delegate authority and signatory rights by group, role, or region
* Keep approval chains current based on live org data
***
Need help with identity setup or SCIM mappings?\
Contact [support@aptlydone.com](mailto:support@aptlydone.com) and we’ll walk you through it.