SSO & SCIM Setup
Aptly supports Single Sign-On (SSO) and SCIM-based user provisioning via a self-service configuration suite, powered by our identity provider, Descope. Your Aptly team will provide a secure setup link unique to your organization. Once received, your identity administrator can follow the steps below to complete the integration.SSO Configuration
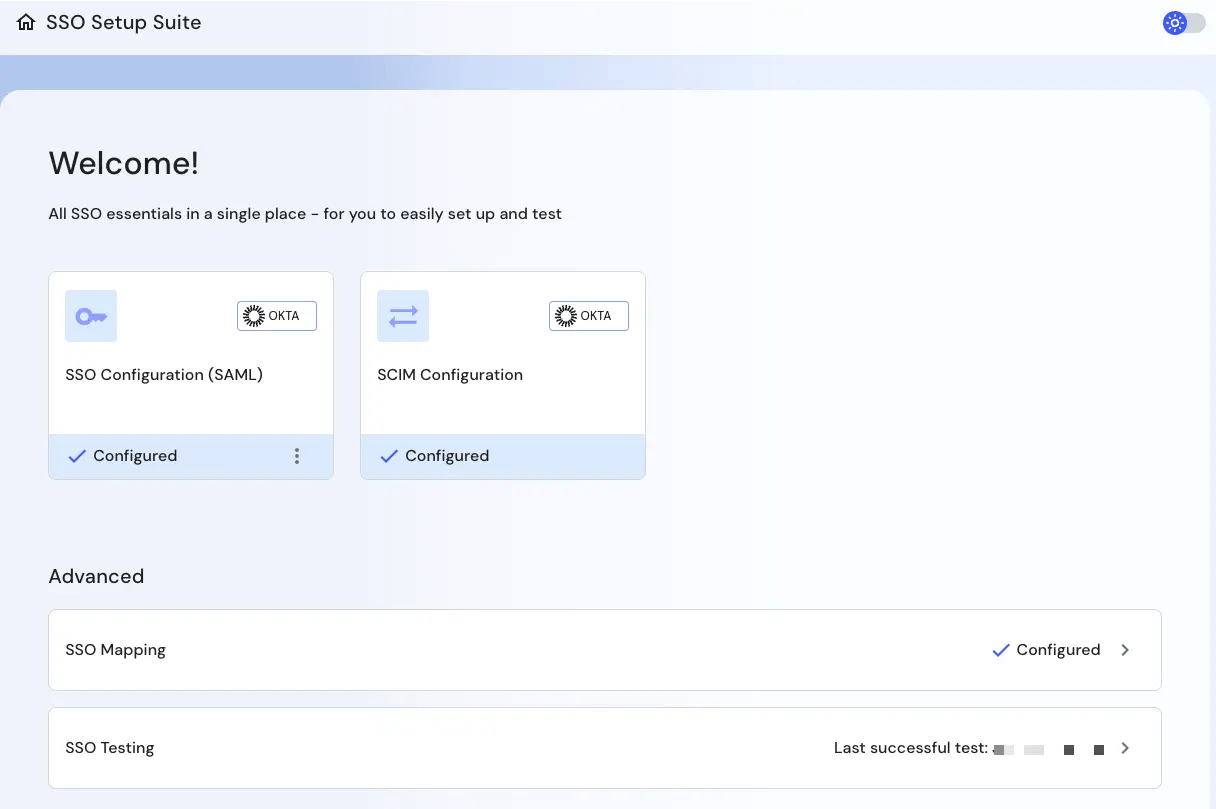
Once your organization receives the Aptly-provided SSO Setup Suite link, your identity administrator can begin the SSO configuration process.1. Launching the Setup Suite
Start by clicking the SSO Configuration card.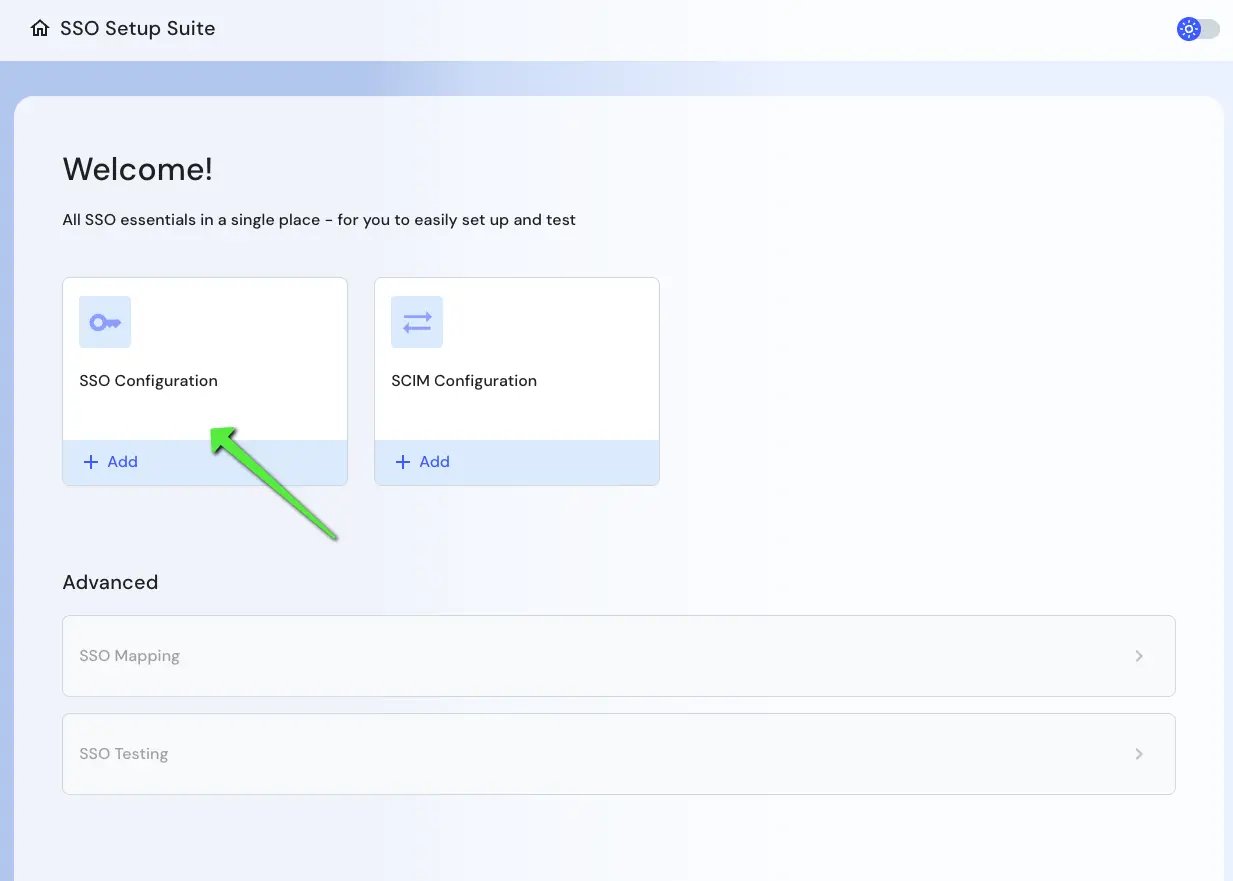
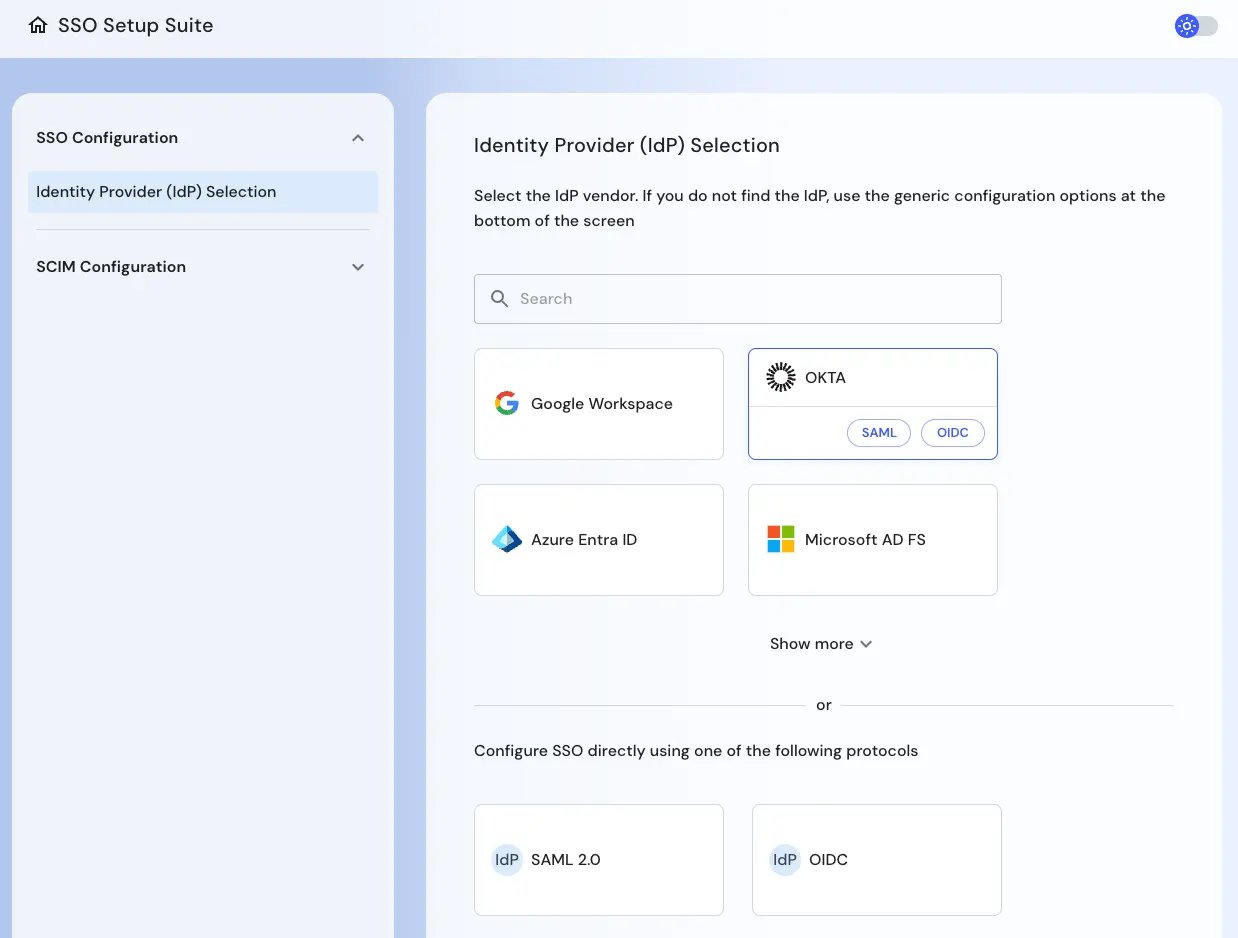
2. Select Your Identity Provider
Choose your organization’s identity provider. Aptly supports:- Google Workspace
- Okta
- Microsoft Entra ID (Azure AD)
- Microsoft AD FS
- Any SAML 2.0 or OIDC-compliant provider
3. Enter Service Provider Information
In your IdP’s admin console, create a new SAML or OIDC app. Then enter the metadata requested by the Setup Suite.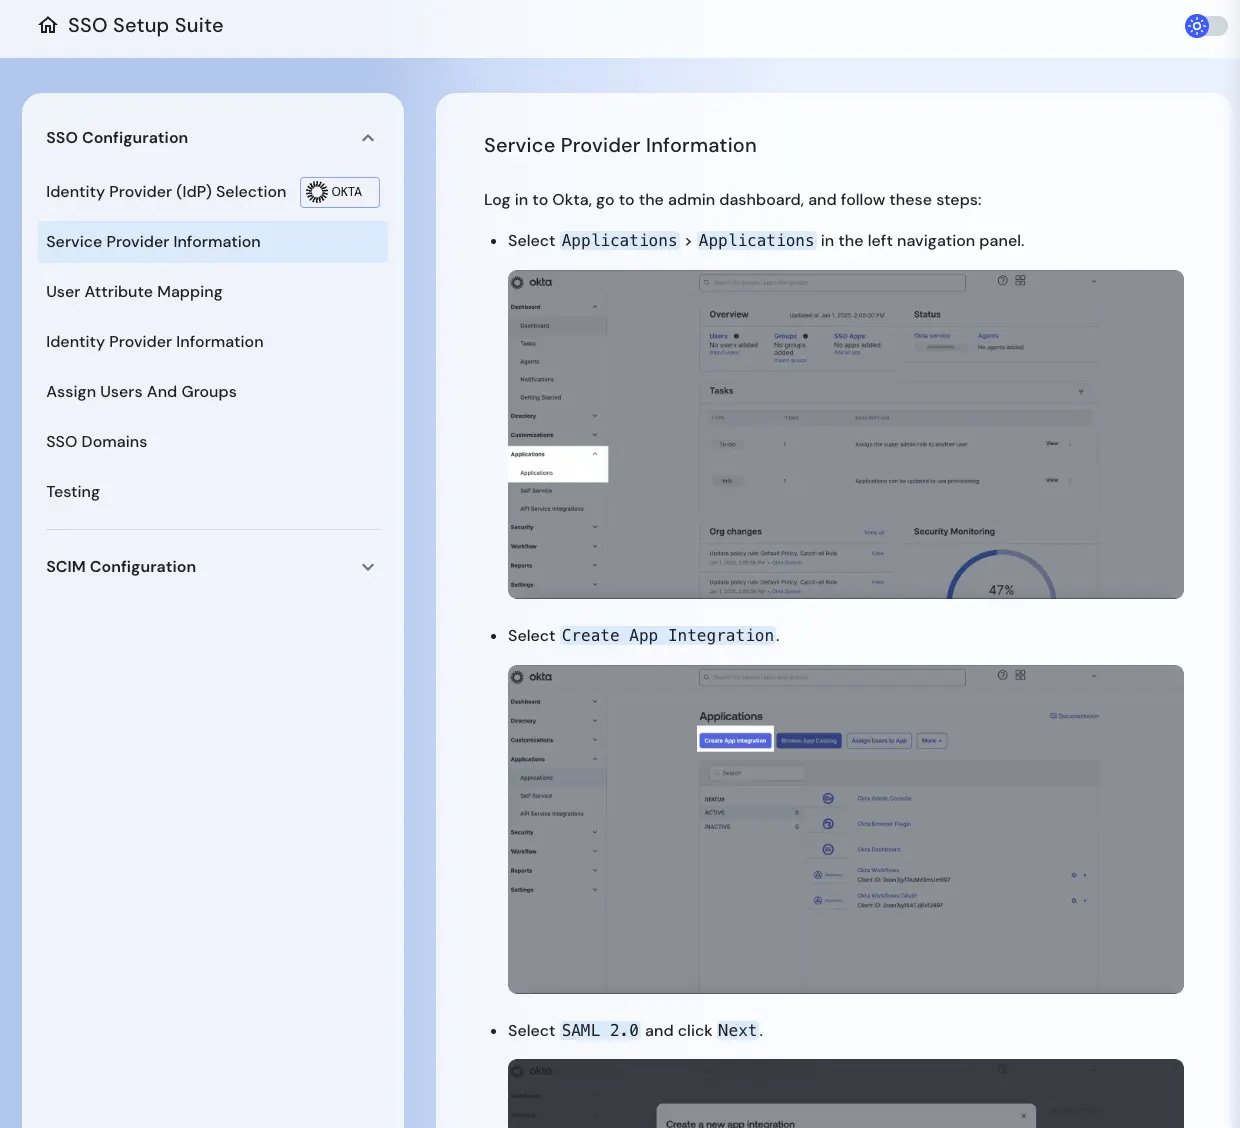
4. Map User Attributes
Match the identity attributes (e.g., email, name) from your IdP to Aptly’s user model. These will apply during each login.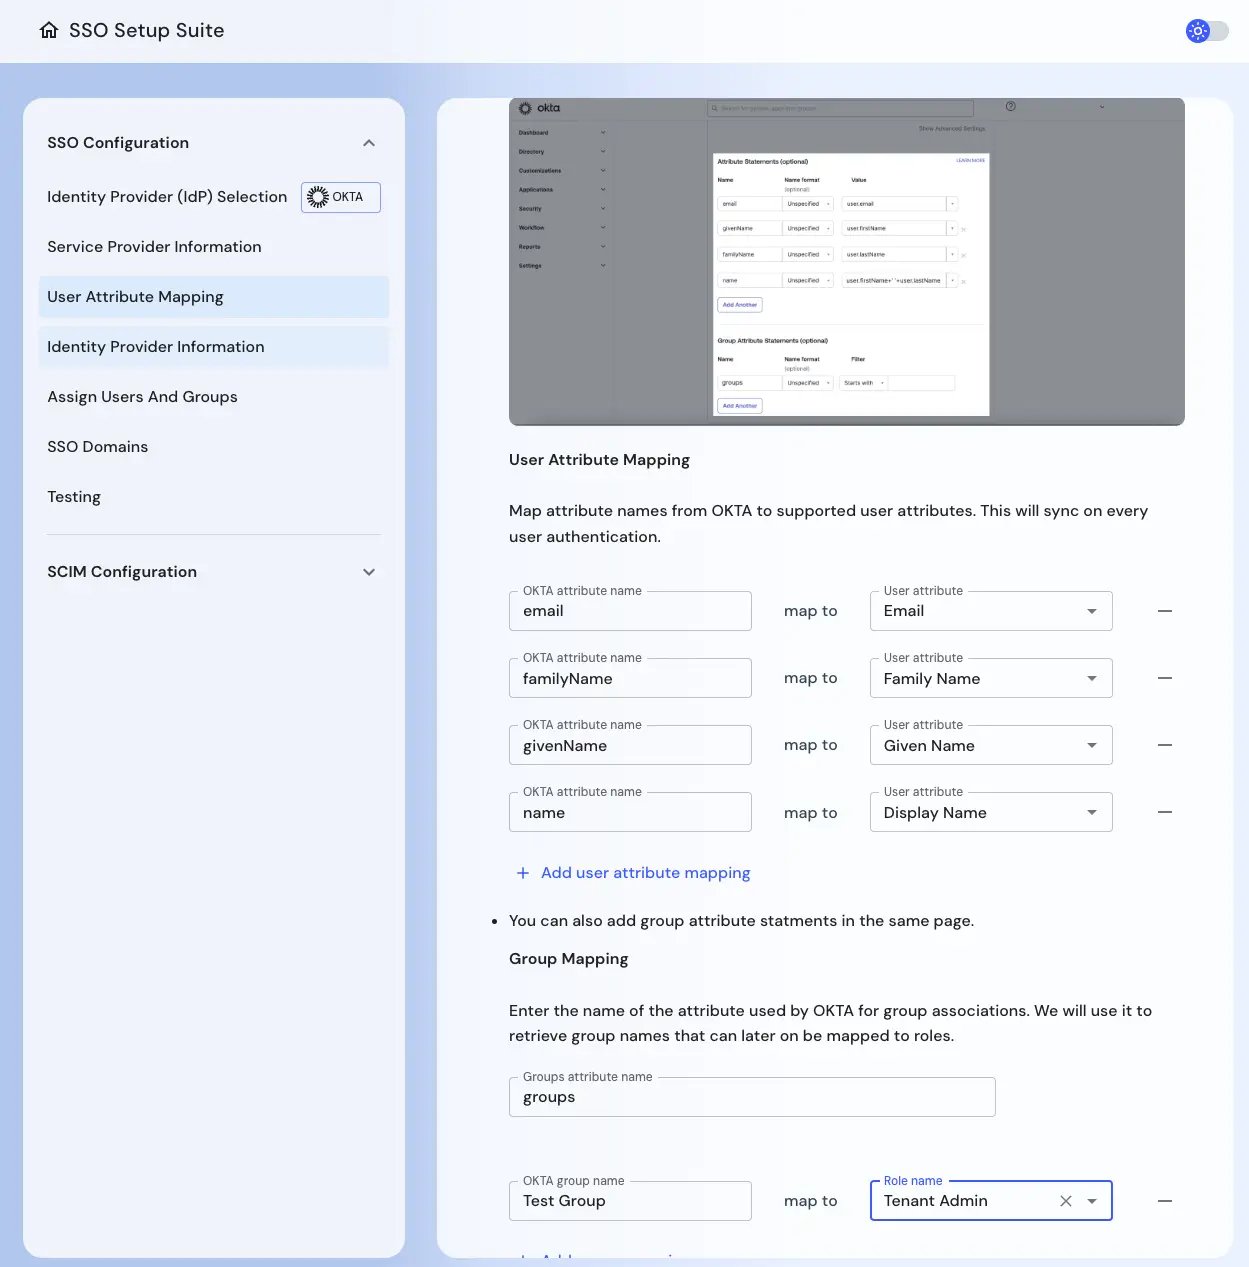
5. Enter Identity Provider Metadata
Paste your IdP metadata URL or upload the values manually to complete the configuration.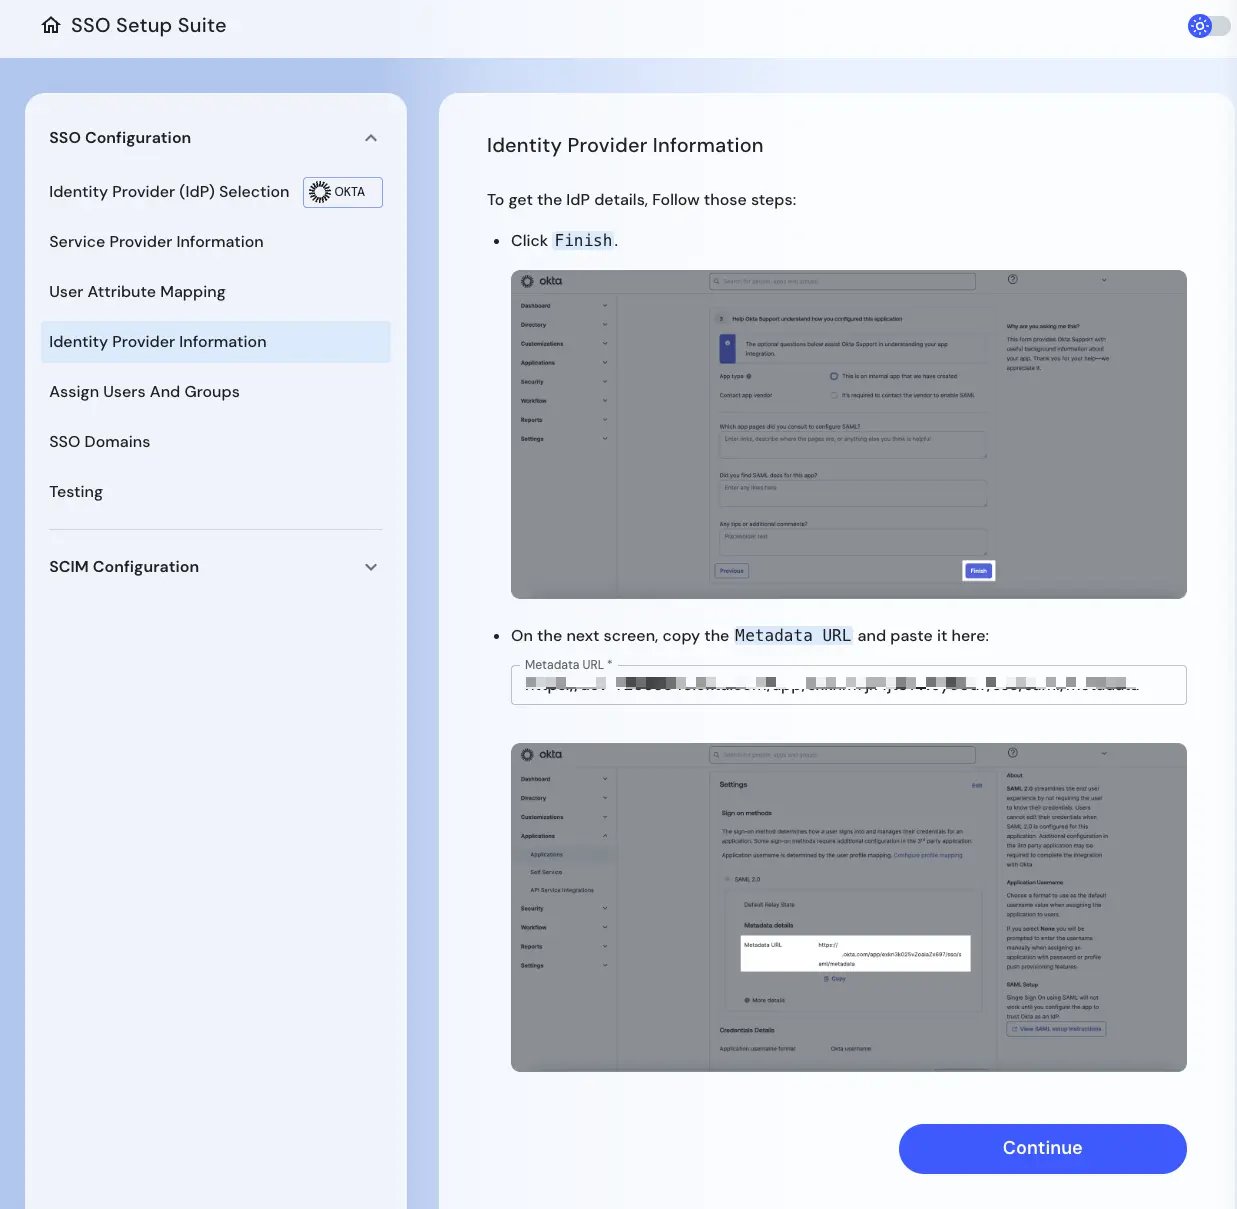
6. Assign Users and Groups
Make sure users and/or groups are assigned to the application in your IdP.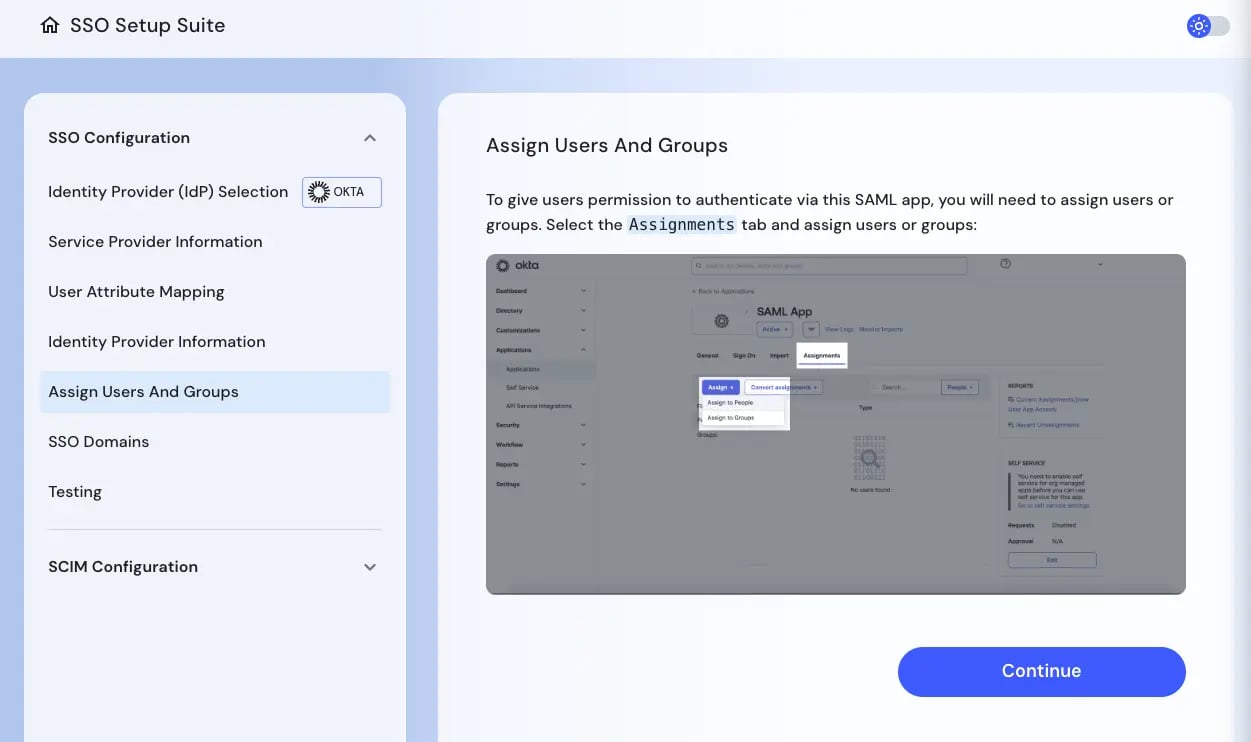
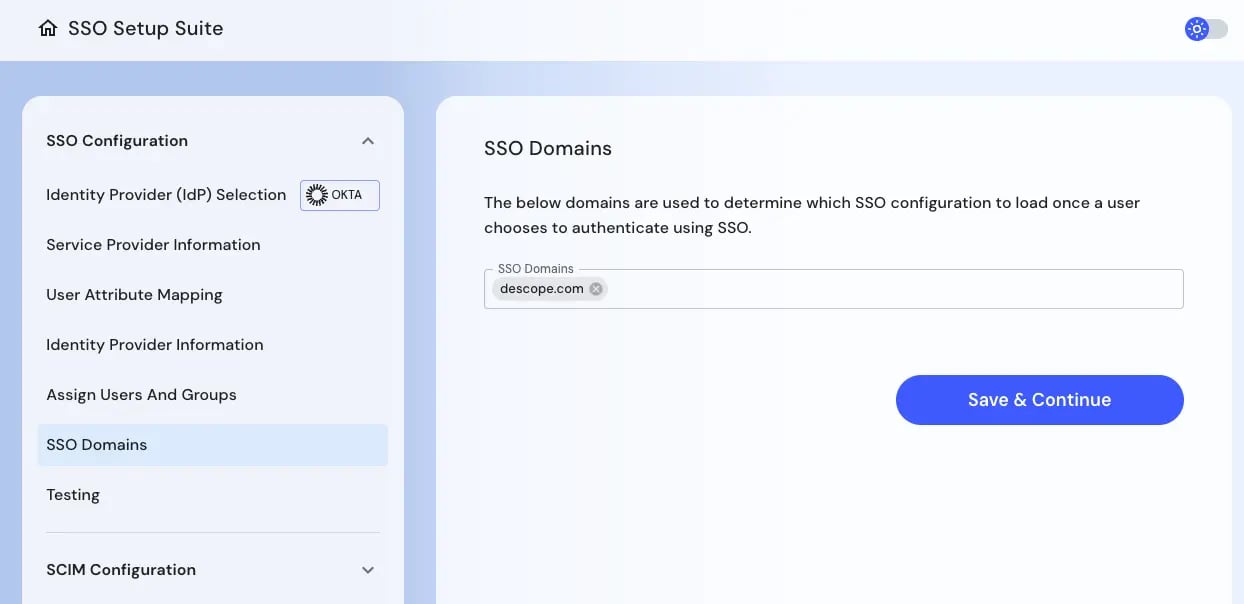
7. Configure SSO Domains
Specify which email domains (e.g.,yourcompany.com) should trigger SSO login through your configuration.
8. Test Your Configuration
Use the Testing screen to review your IdP response and confirm mappings to the Aptly user model.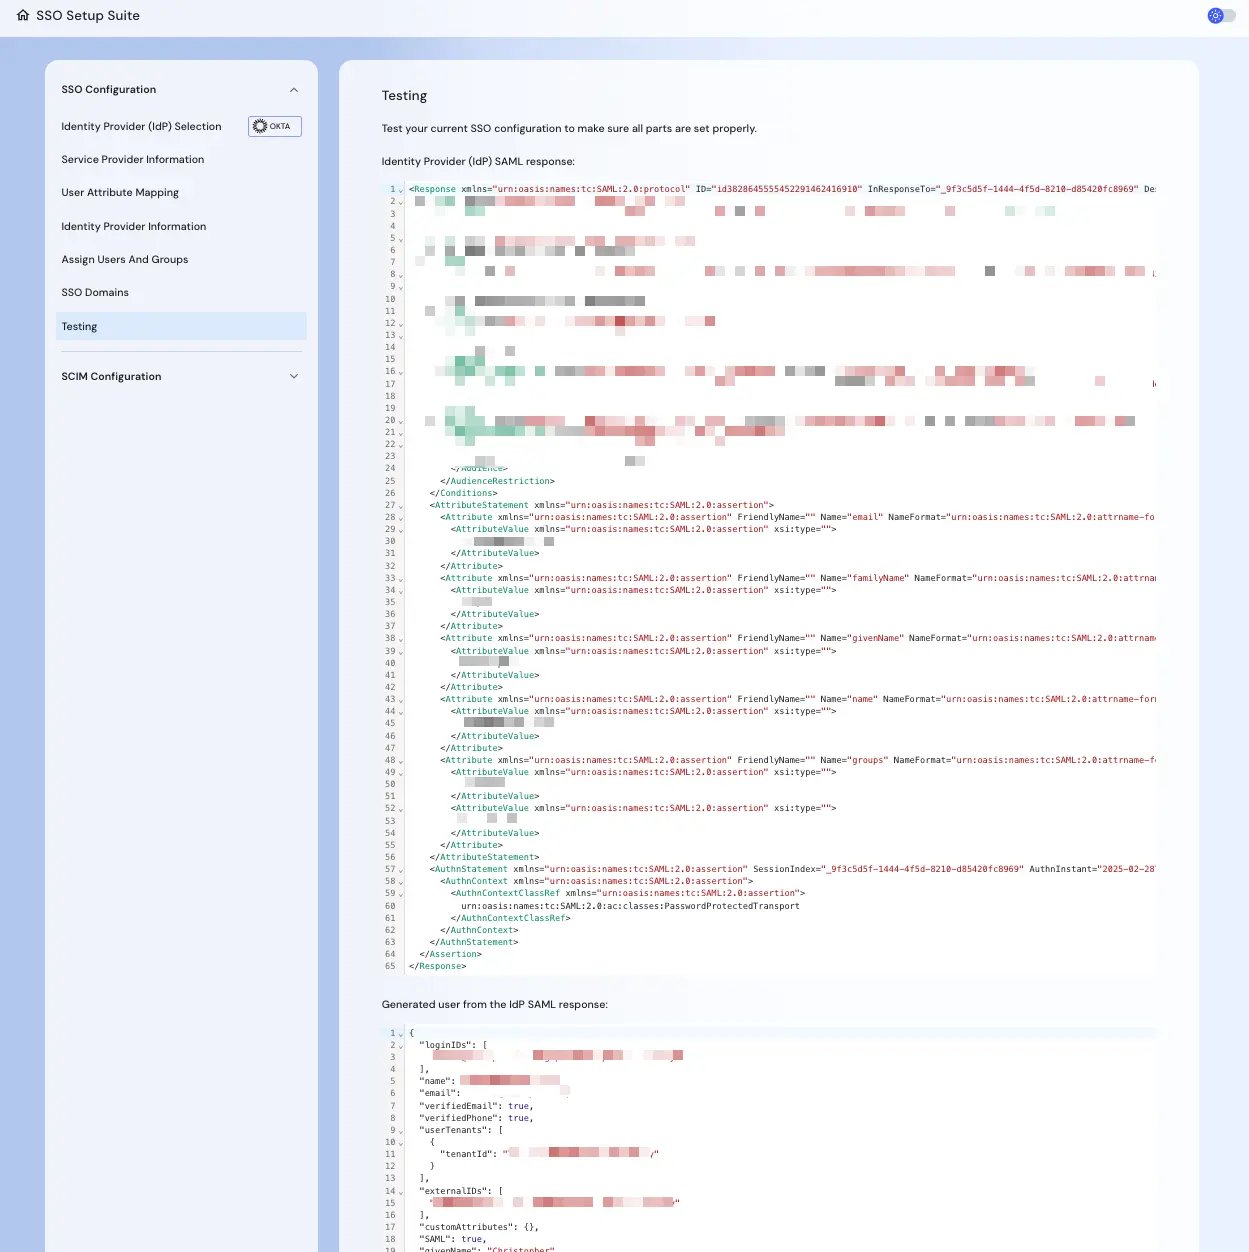
Once your SSO configuration is complete, proceed to SCIM provisioning below.
SCIM Configuration
SCIM provisioning allows your IdP to automatically manage user accounts and group membership in Aptly.1. Launch SCIM Setup
From the Setup Suite homepage, click the SCIM Configuration card.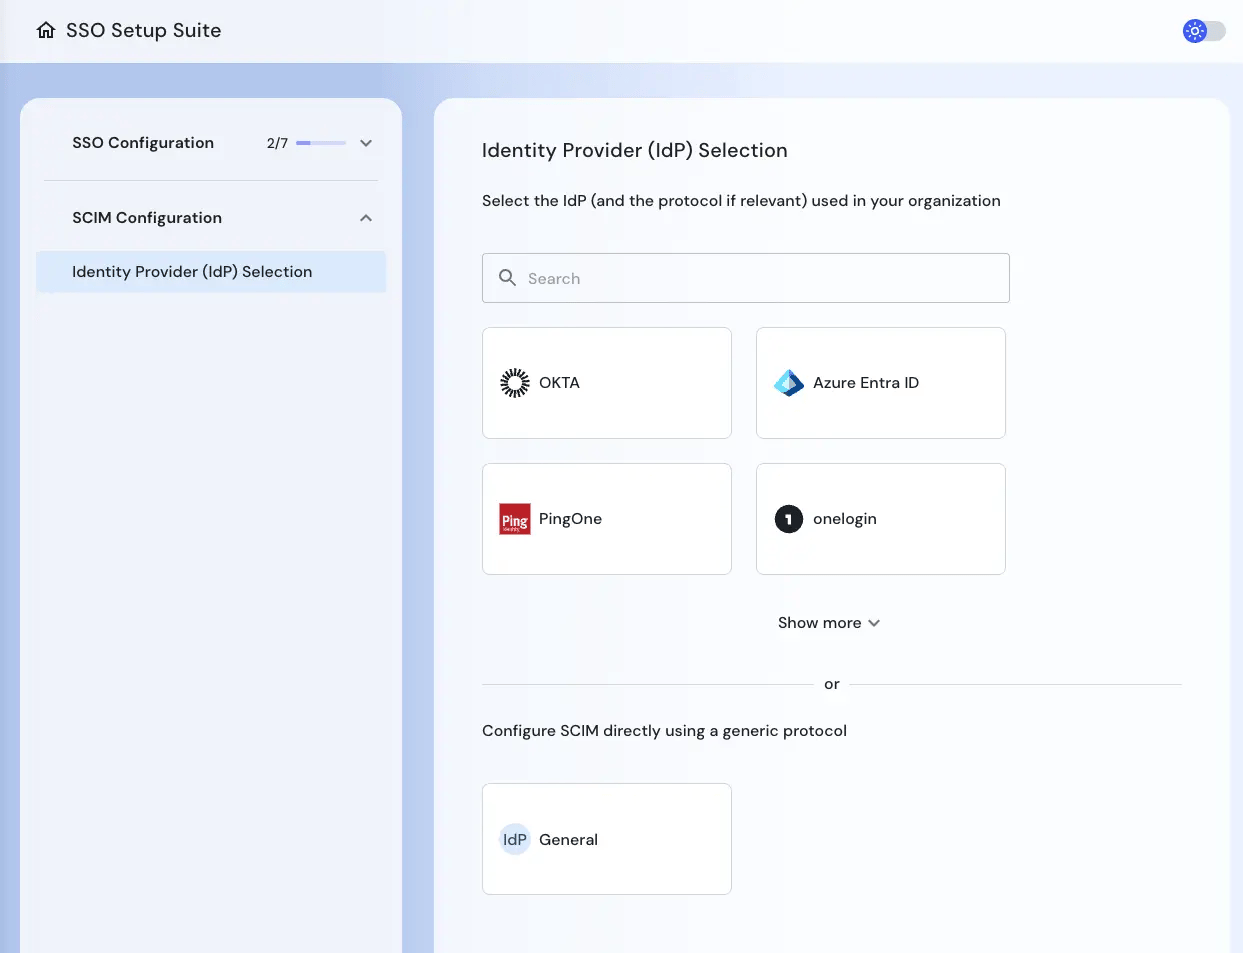
2. Select Your Identity Provider
Select the IdP you’ll use to manage SCIM. Aptly supports:- Okta
- Azure Entra ID
- PingOne
- OneLogin
- Any SCIM 2.0-compatible provider
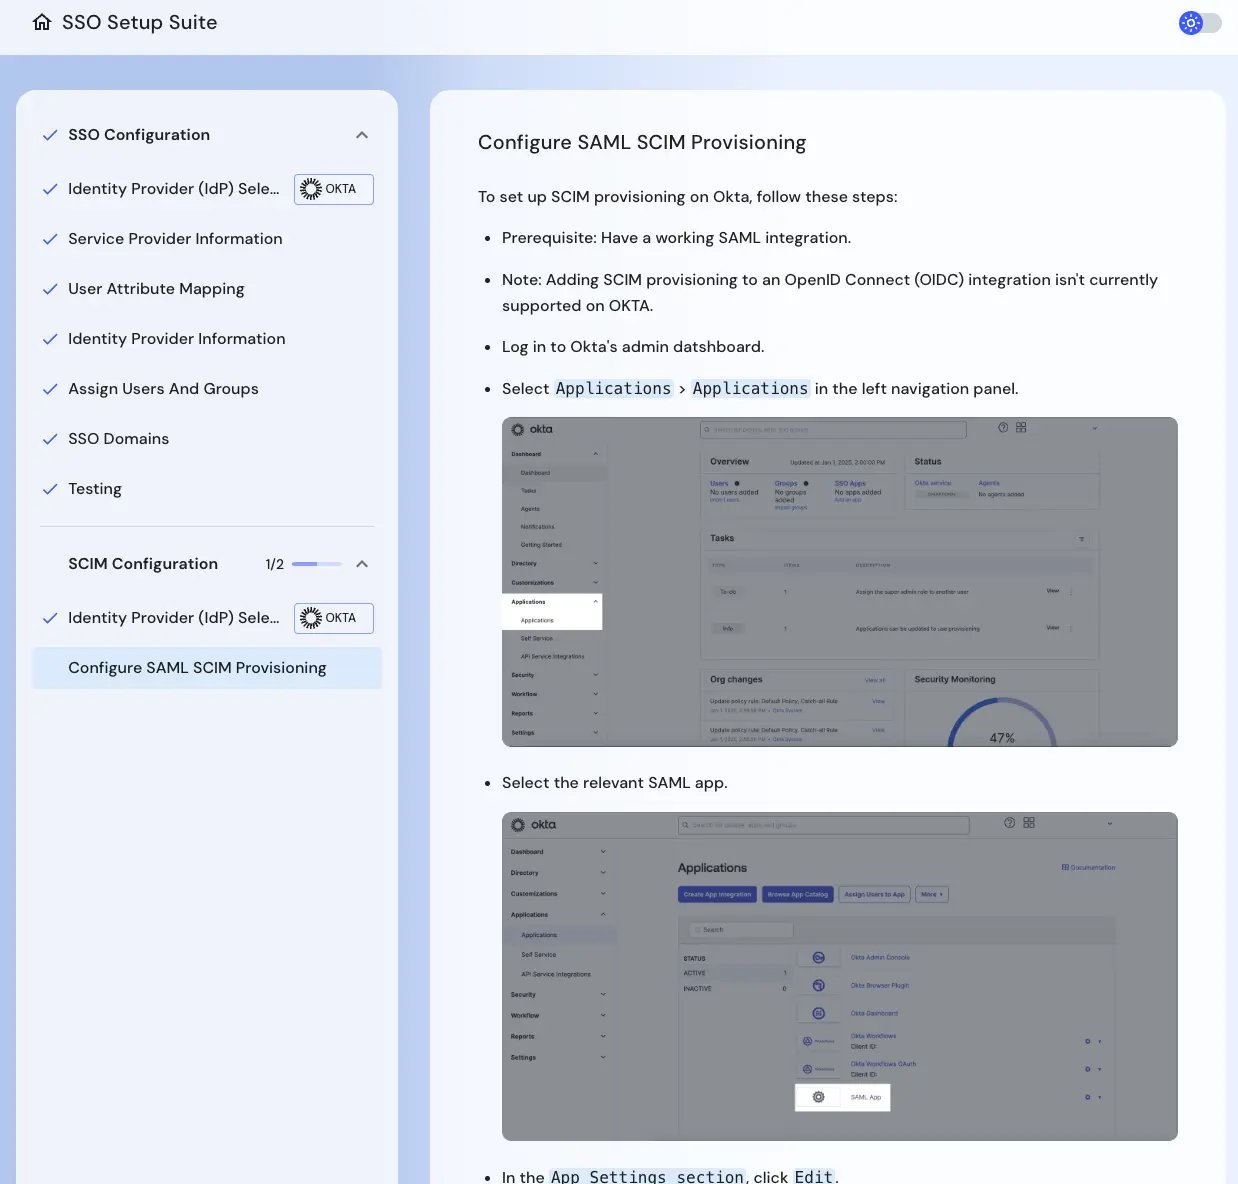
3. Configure SCIM in Your IdP
Use the values provided in the Setup Suite to connect your IdP to Aptly.-
SCIM connector base URL:
https://api.descope.com/scim/v2 -
Authorization Header:
Bearer <your SCIM token>(provided in Setup Suite) - Authentication Mode: HTTP Header
-
Unique Identifier Field:
userName(default) -
Supported Provisioning Actions:
- Import New Users
- Push Profile Updates
- Deactivate Users
- Sync Groups
4. Save and Test
Once configured:- Save the setup
- Use your IdP’s “Provision on demand” or “Test Connector Configuration” feature to validate

⚙️ Once validated, Aptly will begin automatically receiving user and group updates.
What’s Next?
After completing SSO and SCIM setup, you can:- Automatically onboard/offboard users in Aptly
- Delegate authority and signatory rights by group, role, or region
- Keep approval chains current based on live org data
Need help with identity setup or SCIM mappings?
Contact [email protected] and we’ll walk you through it.
Contact [email protected] and we’ll walk you through it.